This tutorial will demonstrate how to add images to an existing gallery on your WordPress post or page.
1. In your dashboard, locate the page or post whose gallery you wish to edit.
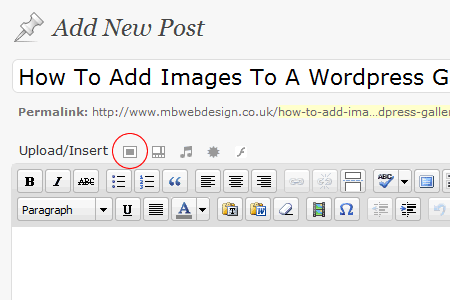
2. Click the ‘Add an Image’ icon. [Circled in the illustration below.]

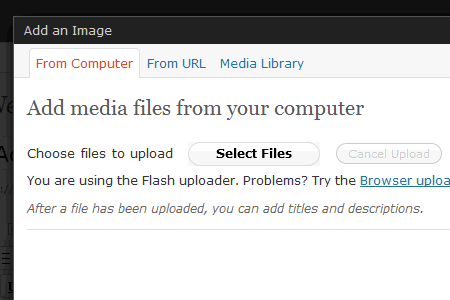
3. You will be prompted to select files from your computer. Click the ‘Select Files’ button. [See the illustration below.]

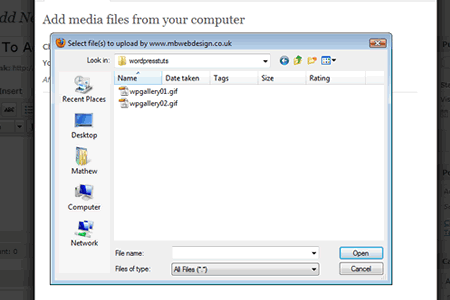
4. A dialog box will apear from which you can browse your computer’s folders for one or more images that you wish to include. To commence uploading files, highlight the desired images and click ‘Open’. [See the illustration below.]

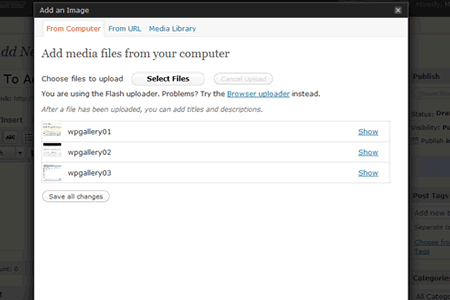
5. Your files will be uploaded and progress bars will be displayed. Once complete, your upload list will look like the illustration below. Simply click ‘Save all changes’ to confirm that the new images should be added to your existing gallery. You may now close the window.

Important notes
- Ensure that the file size does not exceed 2Mb per image. If the files are larger, try resizing them in an image editing program such as Picasa, Photoshop, GIMP or Fireworks.
- Ensure that the image dimensions do not exceed 3000 pixels for height or width. If the files are larger, try resizing them in an image editing program such as Picasa, Photoshop, GIMP or Fireworks.
